


How to replace nappy and diaper elastic
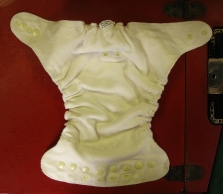
Several times I have been asked about replacing elastic in fitted nappies where the fabric has been fine but the elastic has been totally worn out. I have also read a number of times about others experiencing similar problems. Here, therefore, is a tutorial to help you make such repairs yourself. In these photographs you will see a repair being effected on a Baby Beehinds Bamboo fitted nappy. It has two layers of bamboo and an internal layer of interlock. The original elastic was sewn onto the outer layer of bamboo and interlock, leaving the inner layer of bamboo free.
In this tutorial, the old elastic is not removed in the repair.
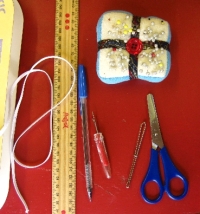
Gather together these items: swimwear elastic, ruler or tape measure, pen, unpicker, elastic bodkin, scissors, pins and sewing machine. This repair can be done with out a sewing machine, in which case you will also need needle, thread and probably a thimble.
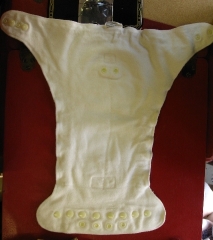
Take the nappy with dead elastic and lay it on a table.
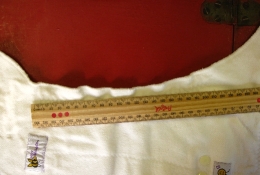
Measure the distance from where the elastic starts to where it finishes. This is easiest if the elastic is totally shot.
Calculate half of the length that you measured and use a pen to mark this on the elastic. Do NOT cut the elastic!
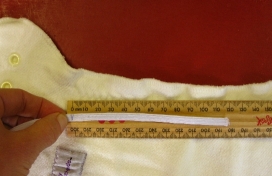
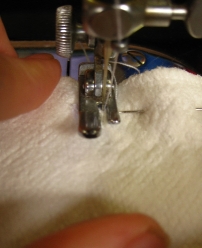
Use the unpicker (or a very sharp pair of scissors) to make a slit in the outer layer of fabric at each end of the dead elastic. Take care not to cut through the inside layer as well since that would weaken the nappy too much and could also make a rough bit which could aggravate the baby's skin.

Take care not to cut through the inside layer as well since that would weaken the nappy too much and could also make a rough bit which could aggravate the baby's skin.
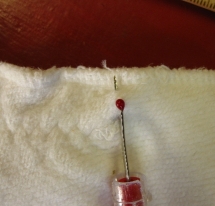
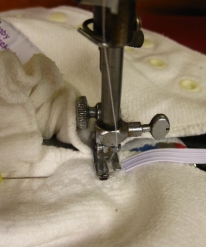
Grip the elastic with the bodkin and thread it through the gap between the overlocked edge of the nappy and where the elastic had originally been sewn.
Pull the elastic right through the casing between the original elastic stitching and the overlocked (serged) outer edge of the leg.
Pull the end of the elastic through till it is very close to disappearing into the casing. Pin the elastic carefully.
Sew the end of the elastic onto the nappy with short zigzag stitches or straight stitch.
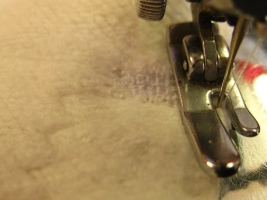
Go back and forth several times to ensure that the elastic is firmly attached and effectively darning the hole that you had cut to allow the insertion of the elastic.
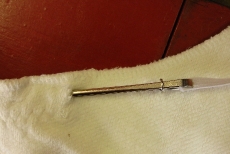
At the other end, pull the elastic tight through the casing until the pen mark measurement comes into view.
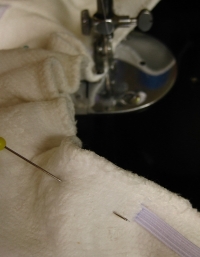
Pin the elastic into the casing. Do NOT cut it yet!
Sew across the elastic and then sew back and forth several times. I am a fan of "chaining on" - sewing on to the next piece rather than cutting the threads and then starting the next line of stitching. Chaining on saves thread, gives you something to help the fabric move away under the feed dogs, makes it faster and reduces the number of threads to tidy up afterwards!
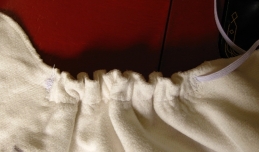
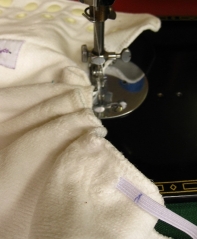
After you have finished sewing the elastic in, remove the sewing from the machine. See how the leg is now nicely gathered up and elasticised?
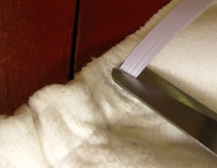
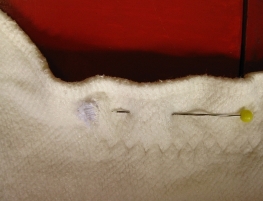
Firmly pull the long end of the elastic and then cut close to the edge of the stitching. By pulling the elastic you will be able to cut it shorter and the free end will shrink back into the end of the cut casing.
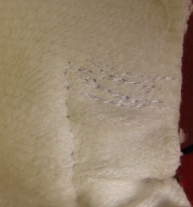
This shows how I've used a straight stitch to go back and forth in a darning fashion to strengthen the cut section and to hold the new elastic in place.
Repeat for all dead elastic.
All done and as good as new!
Contact me if you have any questions about this tutorial!
Other Items of interest:


All prices in AUD. Shipped worldwide from Australia. Copyright 2003-2026 - Marnie Holmes -